iOS开发设计模式之代理

    今天主要讲的是iOS中经典的设计模式-代理模式,代理在我们日常开发中经常用到,面试也是必提的一道题,今天我将用一个delegateDemo通过OC与Swift两种语言来讲述代理模式的应用,我的邮箱是KenenCS@163.com,欢迎多多交流!

一级界面二级界面


delegateDemo效果:
            如图大家可以看到有一个一级界面和二级界面;
            点击一级界面中的按钮“请选择”进入二级界面界面;
            点击二级界面中的cell“点我”返回到一级界面,并把cell上的值带过去赋值给地点;

一、使用Swift语言

appdelegate中布局window和nav

1
2
3
4
5
6
7
8
9
10
11
12
func application(_ application: UIApplication, didFinishLaunchingWithOptions launchOptions: [UIApplicationLaunchOptionsKey: Any]?) -> Bool {
// Override point for customization after application launch.
//布局window和nav
self.window = UIWindow.init(frame: UIScreen.main.bounds);
let vc = ViewController();
let nav = UINavigationController.init(rootViewController: vc);
self.window?.rootViewController = nav;
self.window?.makeKeyAndVisible();
return true
}

一级界面ViewController中布局UI和点击跳转事件

1
2
3
4
5
6
7
8
9
10
11
12
13
14
15
16
17
18
19
20
21
22
23
24
25
26
27
28
29
30
31
32
33
34
35
36
37
38
39
40
41
42
43
44
import UIKit
class ViewController: UIViewController {
//声明属性
var btn = UIButton();
override func viewDidLoad() {
super.viewDidLoad()
// Do any additional setup after loading the view, typically from a nib.
self.view.backgroundColor = UIColor.white;
self.title = "第一界面";
//设置label
let label = UILabel.init(frame: CGRect.init(x: 80, y: 100, width: 90, height: 30));
label.text = "选择地点:";
label.font = UIFont.systemFont(ofSize: 20);
self.view.addSubview(label);
//设置button
self.btn = UIButton.init(frame: CGRect.init(x: 170, y: 106, width: 100, height: 20));
self.btn.setTitle("请选择", for: .normal);
self.btn.setTitleColor(UIColor.red, for: .normal);
self.btn.backgroundColor = UIColor.green;
self.btn.titleLabel?.font = UIFont.systemFont(ofSize: 15);
self.btn.addTarget(self, action: #selector(ViewController.btnClick), for: .touchUpInside);
self.view.addSubview(self.btn);
}
//按钮点击事件
func btnClick() {
let testVC = TestViewController();
//跳入二级界面
self.navigationController?.pushViewController(testVC, animated: false);
}
override func didReceiveMemoryWarning() {
super.didReceiveMemoryWarning()
// Dispose of any resources that can be recreated.
}
}

二级界面TestViewController中布局UI和点击跳转事件

1
2
3
4
5
6
7
8
9
10
11
12
13
14
15
16
17
18
19
20
21
22
23
24
25
26
27
28
29
30
31
32
33
34
35
36
37
38
39
40
41
42
43
44
45
46
47
48
49
import Foundation
import UIKit
class TestViewController: UIViewController,UITableViewDelegate,UITableViewDataSource {
override func viewDidLoad() {
self.view.backgroundColor = UIColor.white;
self.title = "二级界面";
//当你写完TableView代码并遵循好代理的时候,会发现还是会报错,那是因为你没有实现这些代理,实现完就好了
let tableView = UITableView.init(frame: UIScreen.main.bounds, style: .plain);
tableView.delegate = self;
tableView.dataSource = self;
self.view.addSubview(tableView);
}
/***********UITableViewDelegate***********/
func numberOfSections(in tableView: UITableView) -> Int {
return 1;
}
func tableView(_ tableView: UITableView, numberOfRowsInSection section: Int) -> Int {
return 10;
}
func tableView(_ tableView: UITableView, heightForRowAt indexPath: IndexPath) -> CGFloat {
return 40;
}
func tableView(_ tableView: UITableView, cellForRowAt indexPath: IndexPath) -> UITableViewCell {
var cell = tableView.dequeueReusableCell(withIdentifier: "cell");
if cell==nil {
cell = UITableViewCell.init(style: .default, reuseIdentifier: "cell");
}
cell?.textLabel?.text = "点我";
return cell!;
}
//cell的点击事件
func tableView(_ tableView: UITableView, didSelectRowAt indexPath: IndexPath) {
//返回上一级界面
self.navigationController?.popViewController(animated: true);
//取消选中
tableView.deselectRow(at: indexPath, animated: true);
}
}

好了,我们把两个界面的布局都弄好了,功能跳转也弄好了,下面就是写代理了,并把值传过去了;

在二级界面TestViewController.swift文件中进行操作:

创建代理

1
2
3
4
//创建代理
protocol TestDelegate {
func changeTheLocation(str:NSString);
}

在TestViewController将你创建的代理声明成属性

1
2
//声明属性
var delegate:TestDelegate!;

在cell点击事件中我们使用代理,把值传过去

1
2
3
4
5
6
7
8
9
10
11
12
13
14
15
16
//cell的点击事件
func tableView(_ tableView: UITableView, didSelectRowAt indexPath: IndexPath) {
//这个代表 我们需要代理出去的数据源,当然,你可以通过indexPath.row代理出去不同row的值,我这里只是例子只做了一个
let str = "这是新地点";
//当执行这个代理并且是执行这个代理方法的时候
if self.delegate != nil {
//通过这个代理方法把需要的值代理过去
self.delegate.changeTheLocation(str: str as NSString);
}
//返回上一级界面
self.navigationController?.popViewController(animated: true);
//取消选中
tableView.deselectRow(at: indexPath, animated: true);
}


在一级界面ViewController.swift文件中进行操作:

遵循创建的代理

1
2
3
class ViewController: UIViewController,TestDelegate {
}

在点击跳转事件中设置代理

1
2
3
4
5
6
func btnClick() {
let testVC = TestViewController();
//设置的代理
testVC.delegate = self;
self.navigationController?.pushViewController(testVC, animated: false);
}

使用代理

1
2
3
4
5
//在这里实现代理方法,接收代理过来的值
func changeTheLocation(str: NSString) {
//通过代理过来的值来改变按钮的text,即改变地点
btn.setTitle(str as String, for: .normal);
}

一、使用Objective-C语言


    OC语法大家应该都是很熟悉的,这个demo的逻辑是一样的,我demo中注释都很详细的,所以我就不在一一讲解了,直接把代码粘贴上来好了,其实那么多代码关于代理的也就是那么几句,所以大家只需要细看那么几句就行了,我将关于代理的代码都有详细的注释,其余都是UI布局所以没有注释。

appdelegate.m

1
2
3
4
5
6
7
8
9
10
11
- (BOOL)application:(UIApplication *)application didFinishLaunchingWithOptions:(NSDictionary *)launchOptions {
// Override point for customization after application launch.
self.window = [[UIWindow alloc] initWithFrame:[UIScreen mainScreen].bounds];
ViewController *vc = [[ViewController alloc] init];
UINavigationController *nav = [[UINavigationController alloc] initWithRootViewController:vc];
[self.window setRootViewController:nav];
[self.window makeKeyAndVisible];
return YES;
}

ViewController.m

1
2
3
4
5
6
7
8
9
10
11
12
13
14
15
16
17
18
19
20
21
22
23
24
25
26
27
28
29
30
31
32
33
34
35
36
37
38
39
40
41
42
43
44
45
46
47
48
49
50
51
52
53
#import "ViewController.h"
#import "TestViewController.h"
//遵循创建的这个代理TestDelegate
@interface ViewController () <TestDelegate> {
UIButton *btn;
}
@end
@implementation ViewController
- (void)viewDidLoad {
[super viewDidLoad];
// Do any additional setup after loading the view, typically from a nib.
self.view.backgroundColor = [UIColor whiteColor];
self.title = @"第一界面";
UILabel *label = [[UILabel alloc] initWithFrame:CGRectMake(80, 100, 90, 30)];
label.text = @"选择地点:";
label.font = [UIFont systemFontOfSize:20];
[self.view addSubview:label];
btn = [[UIButton alloc] initWithFrame:CGRectMake(170, 106, 100, 20)];
[btn setTitle:@"请选择" forState:UIControlStateNormal];
[btn setTitleColor:[UIColor redColor] forState:UIControlStateNormal];
btn.backgroundColor = [UIColor greenColor];
btn.titleLabel.font = [UIFont systemFontOfSize:15];
[btn addTarget:self action:@selector(btnClick) forControlEvents:(UIControlEventTouchUpInside)];
[self.view addSubview:btn];
}
- (void)btnClick {
TestViewController *testVC = [[TestViewController alloc] init];
//设置的代理
testVC.delegate = self;
[self.navigationController pushViewController:testVC animated:NO];
}
//在这里实现代理方法,接收代理过来的值
- (void)changeTheLocation:(NSString *)str {
//通过代理过来的值来改变按钮的text,即改变地点
[btn setTitle:str forState:(UIControlStateNormal)];
}
- (void)didReceiveMemoryWarning {
[super didReceiveMemoryWarning];
// Dispose of any resources that can be recreated.
}
@end

TestViewController.h

1
2
3
4
5
6
7
8
9
10
11
12
13
14
#import <UIKit/UIKit.h>
//声明代理
@protocol TestDelegate <NSObject>
//改变地点的方法
- (void)changeTheLocation:(NSString *)str;
@end
@interface TestViewController : UIViewController
//让创建的代理变为一个属性,记着用弱引用
@property (nonatomic,weak)id<TestDelegate> delegate;
@end

TestViewController.m

1
2
3
4
5
6
7
8
9
10
11
12
13
14
15
16
17
18
19
20
21
22
23
24
25
26
27
28
29
30
31
32
33
34
35
36
37
38
39
40
41
42
43
44
45
46
47
48
49
50
51
52
53
54
55
56
57
58
59
#import "TestViewController.h"
@interface TestViewController ()<UITableViewDelegate,UITableViewDataSource>
@end
@implementation TestViewController
- (void)viewDidLoad {
[super viewDidLoad];
// Do any additional setup after loading the view.
self.view.backgroundColor = [UIColor whiteColor];
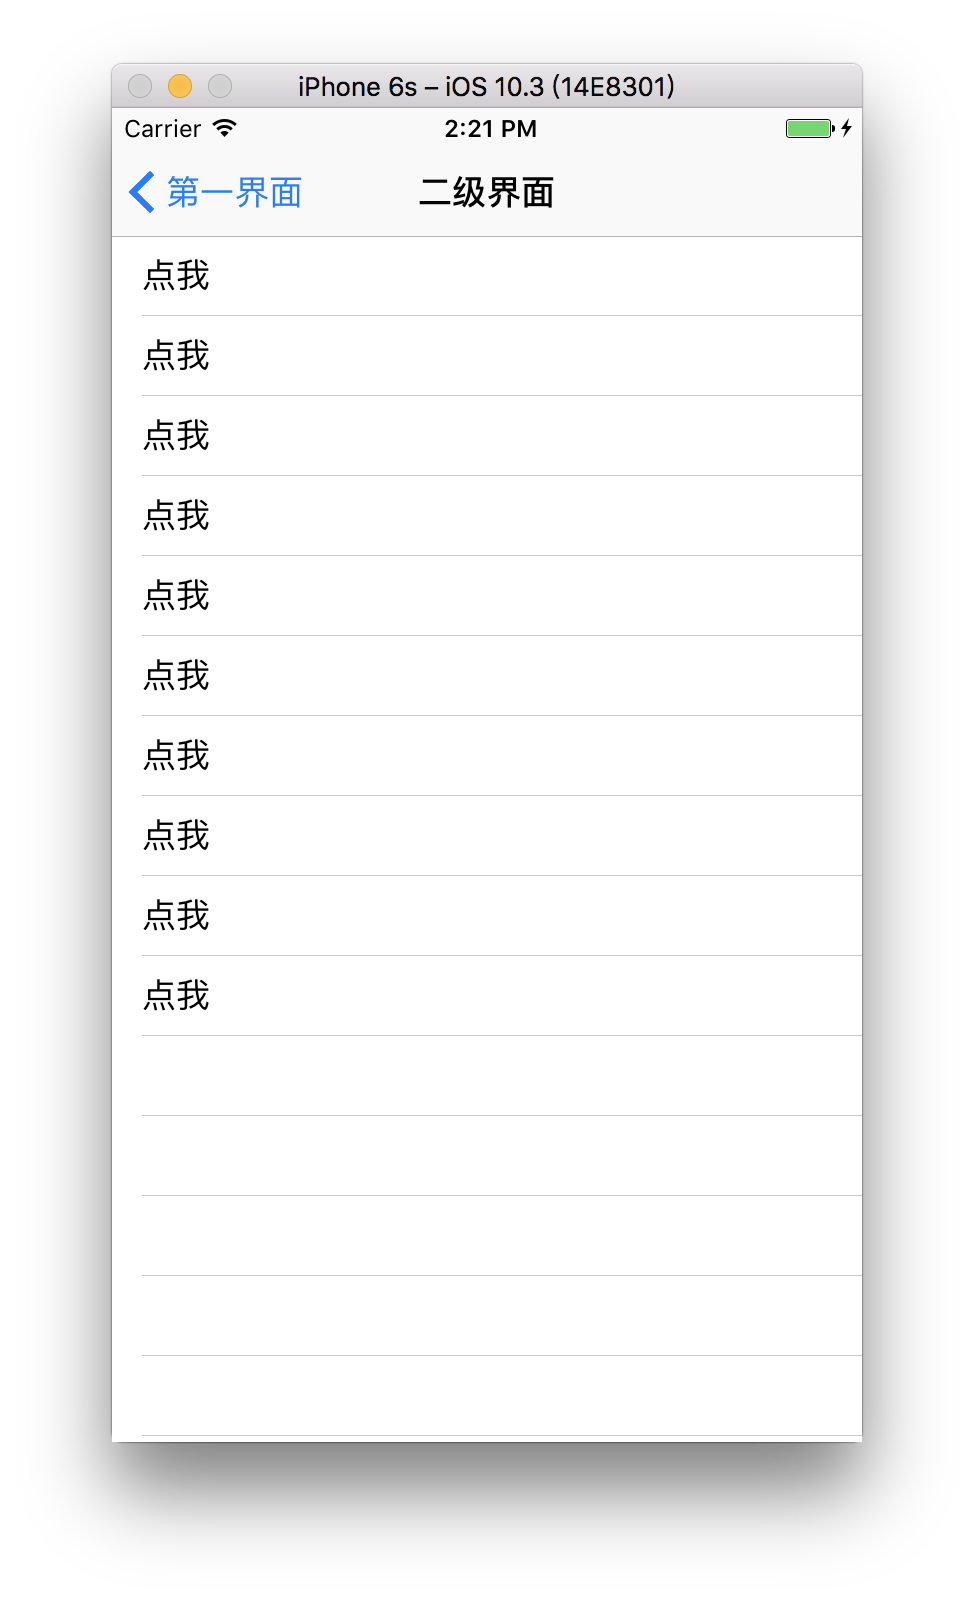
self.title = @"二级界面";
UITableView *tableView = [[UITableView alloc] initWithFrame:[UIScreen mainScreen].bounds style:UITableViewStylePlain];
tableView.delegate = self;
tableView.dataSource = self;
[self.view addSubview:tableView];
}
#pragma mark ----tableViewDelegate
- (NSInteger)numberOfSectionsInTableView:(UITableView *)tableView {
return 1;
}
- (NSInteger)tableView:(UITableView *)tableView numberOfRowsInSection:(NSInteger)section {
return 10;
}
- (CGFloat)tableView:(UITableView *)tableView heightForRowAtIndexPath:(NSIndexPath *)indexPath {
return 40;
}
- (UITableViewCell *)tableView:(UITableView *)tableView cellForRowAtIndexPath:(NSIndexPath *)indexPath {
UITableViewCell *cell = [tableView dequeueReusableCellWithIdentifier:@"cell"];
if (!cell) {
cell = [[UITableViewCell alloc] initWithStyle:(UITableViewCellStyleDefault) reuseIdentifier:@"cell"];
}
cell.textLabel.text = @"点我";
return cell;
}
//cell的点击事件
- (void)tableView:(UITableView *)tableView didSelectRowAtIndexPath:(NSIndexPath *)indexPath {
//这个代表 我们需要代理出去的数据源,当然,你可以通过indexPath.row代理出去不同row的值,我这里只是例子只做了一个
NSString *str = @"这是新地点";
//当执行这个代理并且是执行这个代理方法的时候
if (self.delegate && [self.delegate respondsToSelector:@selector(changeTheLocation:)]) {
//通过这个代理方法把需要的值代理过去
[self.delegate changeTheLocation:str];
}
//返回上一级界面
[self.navigationController popViewControllerAnimated:YES];
//取消选中
[tableView deselectRowAtIndexPath:indexPath animated:YES];
}


以上就是此次讲解,欢迎大家下载交流!Demo地址如下:
Swift版本:delegateDemo_Swift
OC版本:delegateDemo_OC

文章目录
  1. 1. 一、使用Swift语言
    1. 1.1. appdelegate中布局window和nav
    2. 1.2. 一级界面ViewController中布局UI和点击跳转事件
    3. 1.3. 二级界面TestViewController中布局UI和点击跳转事件
    4. 1.4. 创建代理
    5. 1.5. 在TestViewController将你创建的代理声明成属性
    6. 1.6. 在cell点击事件中我们使用代理,把值传过去
    7. 1.7. 遵循创建的代理
    8. 1.8. 在点击跳转事件中设置代理
    9. 1.9. 使用代理
  2. 2. 一、使用Objective-C语言
    1. 2.1. appdelegate.m
    2. 2.2. ViewController.m
    3. 2.3. TestViewController.h
    4. 2.4. TestViewController.m
|